Creating events on the Sell Tickets App is quick and easy.
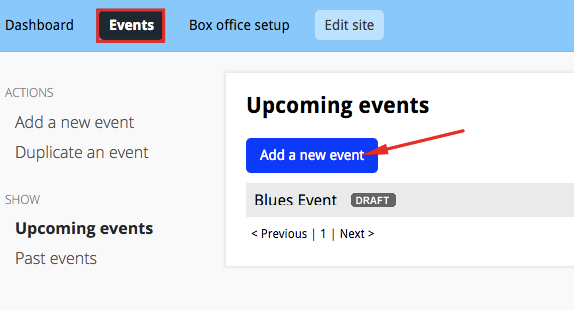
1. Load up the Sell Tickets App from your dashboard then go to Manage my Events. A new page opens, click the Events tab, and click on the ‘Add a new event’ button.

2. Add relevant information such as the event name, and when and where it is taking place. You can also add a description and upload an image for your event; these will appear on the event page.
3. You will then need to add tickets for your event, so click ‘Add tickets’. A separate box will appear and you will be able to input the details of the ticket, including whether your tickets will be free or paid. For more information on managing tickets, see Managing Tickets
4. When you’re finished, click ‘Save ticket’ and then ‘Save Event’. At this point your event will be saved as a draft, which means it will not be visible to the general public in your online box office.
Making your event live
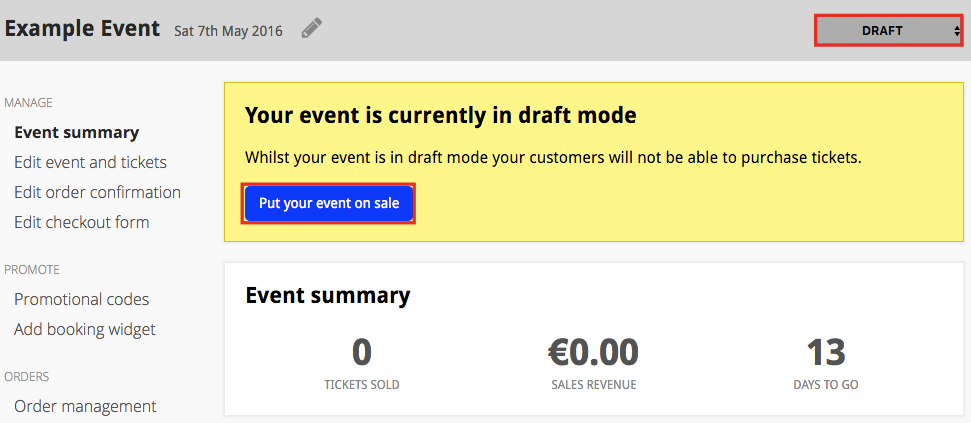
When you first create an event it will be saved in draft mode. This makes it invisible to the general public until you decide to make it live. Before making your event live, you may want to click ‘Preview your event’ to see what it will look like.
To make free events live, you can immediately click the ‘Put your event on sale’ button, or click the ‘DRAFT’ drop-down menu and set the event state to ‘ON SALE’.

You will then need to confirm your choice and your event will be live!
To make paid events live, you will first need to set up a payment system with Stripe or PayPal to collect payment from ticket sales.

You can also add a payment system at any time via ‘Box office setup’. We have handy guides for integrating Stripe and PayPal using this method, and you can compare their pricing structures here.
Remember that you can still make changes to your event once it’s live. Live events can be put back into draft mode using the same drop-down menu. You can also close ticket sales this way, while keeping the event live and visible to the public.


